As blockchain technology advances, having a seamless and secure way to access decentralized networks is crucial. Setting up a wallet is the first step for users eager to explore Base Chain.
In this article, we’ll cover everything you need to know about configuring your wallet, focusing on using the Wallet for Base and adding Base to other popular Ethereum Virtual Machine (EVM), compatible wallets like MetaMask.

Using Coinbase Wallet for Base
The Coinbase Wallet browser extension provides native support for Base, making it one of the easiest ways to interact with the network. Follow these steps to set up Coinbase Wallet for Base:
- Log in to Coinbase Wallet: Open the Coinbase Wallet browser extension and log in to your account.
- Connect to an App: Use Coinbase Wallet to connect to a decentralized application (dApp).
- Switch to Base Network:
- Click the network icon in the upper right-hand corner of the extension.
- Select Base from the network selection menu.
Your active network is now set to Base. You’re ready to explore the Base ecosystem with ease.
Adding Base to Other Wallets
If you’re using a different EVM-compatible wallet, such as MetaMask, you can manually add Base as a custom network. Here’s how:
Adding Base to MetaMask
1. Open MetaMask: Launch the MetaMask browser extension and log in to your account.
2. Access the Network Selection Dropdown: Click the dropdown button at the top of the extension to view available networks.
3. Add a New Network
- Click the Add Network button.
- Select Add a network manually.
4. Enter Base Mainnet Details: Fill out the following fields in the “Add a network manually” dialog:
- Network Name: Base Mainnet
- Description: The public mainnet for Base.
- RPC Endpoint: https://mainnet.base.org
- Chain ID: 8453
- Currency Symbol: ETH
- Block Explorer: https://base.blockscout.com/
5. Save the Network: Tap the Save button to add Base as a network.
6. Select Base: From the network selection dropdown menu, choose Base Mainnet to connect.
You’re now connected to Base Mainnet via MetaMask.
Exploring the Testnet: Base Sepolia
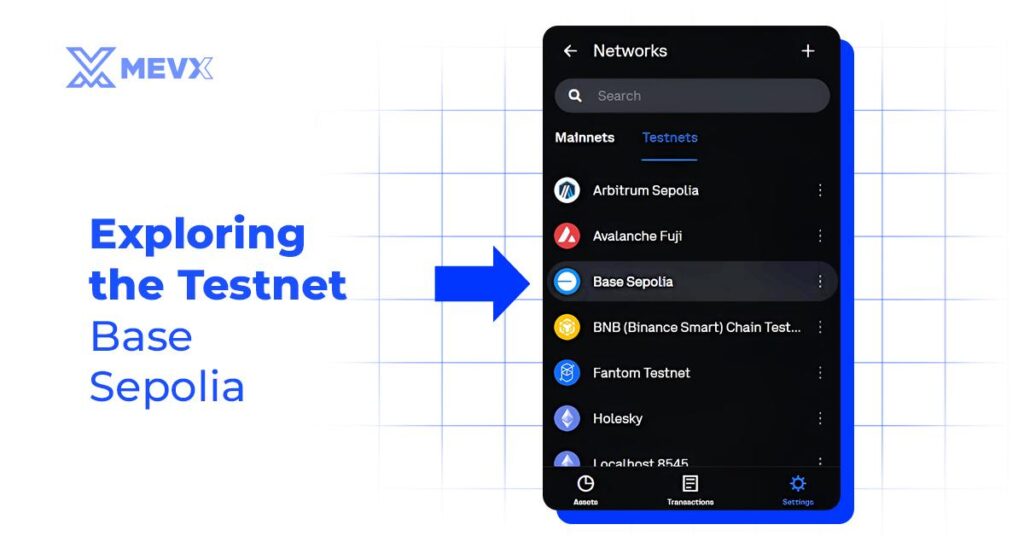
For developers and testers, Base Sepolia offers a sandbox environment to interact with Base without using real funds. The Coinbase Wallet browser extension supports Base Sepolia by default, but you can also add it to MetaMask manually.

Using Base Sepolia with Coinbase Wallet
1. Log in to Coinbase Wallet: Open the browser extension and log in to your account.
2. Switch to Testnet Mode:
- Click the network icon in the upper right-hand corner.
- Select More Networks.
- Navigate to the Testnets tab.
3. Select Base Sepolia: Click Base Sepolia to switch your active network to the Testnet.
Adding Base Sepolia to MetaMask
1. Open MetaMask: Launch the MetaMask extension and log in.
2. Access the Network Selection Dropdown: Click the dropdown button to view available networks.
3. Add Base Sepolia: Click the Add network button and select Add a network manually.
4. Enter Base Sepolia Details: Fill out the following information:
- Network Name: Base Sepolia
- RPC Endpoint: https://sepolia.base.org
- Chain ID: 84532
- Currency Symbol: ETH
- Block Explorer: https://sepolia-explorer.base.org
5. Save the Network: Tap the Save button to add Base Sepolia as a network.
6. Select Base Sepolia: Choose Base Sepolia from the network selection dropdown to connect to the Testnet.
Why Choose a Wallet for Base?
Setting up a wallet for Base is straightforward, but why should you consider using a wallet or integrating Base into your existing wallet?

- Ease of Use: Coinbase Wallet offers a seamless setup for Base, with native support and an intuitive interface.
- Low Fees: Whether you’re on the Mainnet or Testnet, Base provides significantly reduced transaction costs thanks to its Layer 2 architecture.
- Interoperability: Base’s compatibility with other EVM-compatible wallets ensures flexibility and accessibility for all users.
- Security: By anchoring data to Ethereum’s Layer 1, Base inherits the robust security features of Ethereum.
Conclusion
Getting started with Base Chain is a simple yet powerful step towards exploring Ethereum’s expanding Layer 2 ecosystem. Whether you’re using Coinbase Wallet or MetaMask, the process of setting up Base is straightforward and accessible. By leveraging the wallet for Base’s seamless integration, reduced fees, and enhanced scalability, users can enjoy a superior blockchain experience while contributing to the growth of Ethereum’s ecosystem.
Start your journey with Base today and unlock the potential of fast, affordable, and secure blockchain interactions.
Follow MevX for more tips and strategies now!
Share on Social Media:
