Main Takeaways
- This article covers the key concepts you need to understand to send and receive TRX.
- Instructions to send and receive TRX are also provided.
Send and Receive TRX
Introduction
TronLink is a crypto wallet officially developed by the TRON team. Due to its safety and compatibility with the TRON blockchain, we recommend you use this to transfer TRX tokens. You can follow this guide to create a TronLink wallet.
Understand the Concepts
There are some basic concepts you need to understand before transferring TRX to avoid confusion.
Wallet Address = Bank Account Number
To send TRX to someone, you will need their wallet address. In contrast, if someone wants to send TRX to you, that person will need your wallet address. This is similar to the banking system. Multiple wallets are multiple bank accounts.
Deposit = Receive; Withdraw = Send
When you choose “deposit” in a wallet, it means the wallet is on the receiving end. Likewise, when you choose “withdraw,” the wallet is now sending the tokens.
TRC-10 = On chain, TRC-20 = Cross chains
TRC-10 and TRC-20 are the two token standards, or two types of tokens, on the TRON network.
- TRC-10 tokens are simpler and function only within the TRON blockchain. TRX is a TRC-10.
- TRC-20 tokens are more advanced, support smart contracts, and can be used across multiple blockchains. A prominent example of TRC-20 is USDT.
Bandwidth and Energy
Most blockchains require their native tokens as gas fees. For instance, Solana takes a small amount of SOL, and Ethereum requires ETH. TRON users, on the other hand, can stake TRX to receive bandwidth and energy to cover the fees. Tokens with the TRC-10 standard only require bandwidth, while TRC-20 tokens require both energy and bandwidth.
How to Receive/Deposit TRX into TronLink Wallet
To deposit TRX to TronLink, you have to possess some TRX in another wallet or on an exchange first. If you need instructions, we have covered it in our “How to buy TRX?” article. We will use Binance as the main exchange here.
Step 1: Open TronLink and Get Your Deposit Address
- Open your TronLink wallet.
- Select the “Receive” option.
- Copy the wallet address.
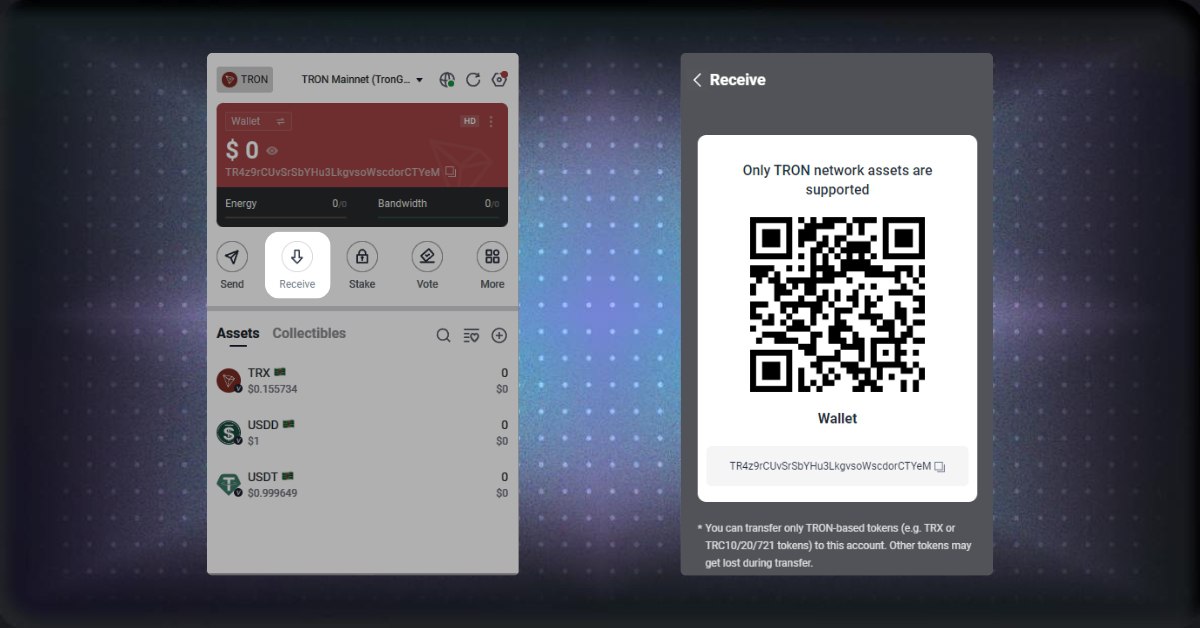
Open TronLink and click “Receive”
Step 2: Go to Binance and Withdraw TRX
- Log in to your Binance account.
- Visit the Binance withdraw section.
- Select TRX (TRON) as the token you want to withdraw.
- Paste your copied TronLink wallet address into the withdrawal field.
- Make sure to set the network to the Tron (TRC-20).
- Enter the amount of TRX you wish to transfer.
Binance will charge 1 TRX no matter the value of the transaction.
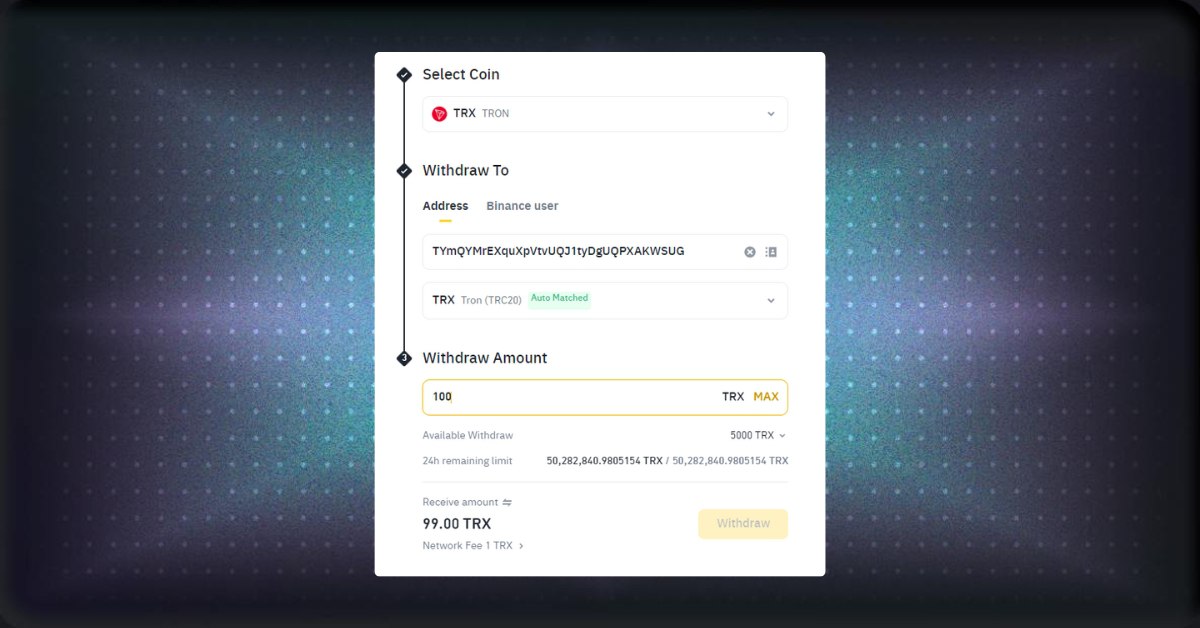
Withdraw TRX on Binance
Step 3: Confirm the Transaction
Double-check that the wallet address is correct. Your transaction will go through even if the wallet address is incorrect.
Depending on network traffic, your TRX might take a few minutes to arrive.
How to Send/Withdraw TRX from TronLink
To withdraw TRX from TronLink, you will need the wallet address of the receiver. In this guide, we will withdraw TRX to Binance.
Step 1: Get the Deposit Address
- Visit the Binance deposit section.
- Choose TRX (TRON).
- Select the Tron (TRC-20) network.
- Copy the deposit address that Binance provides.
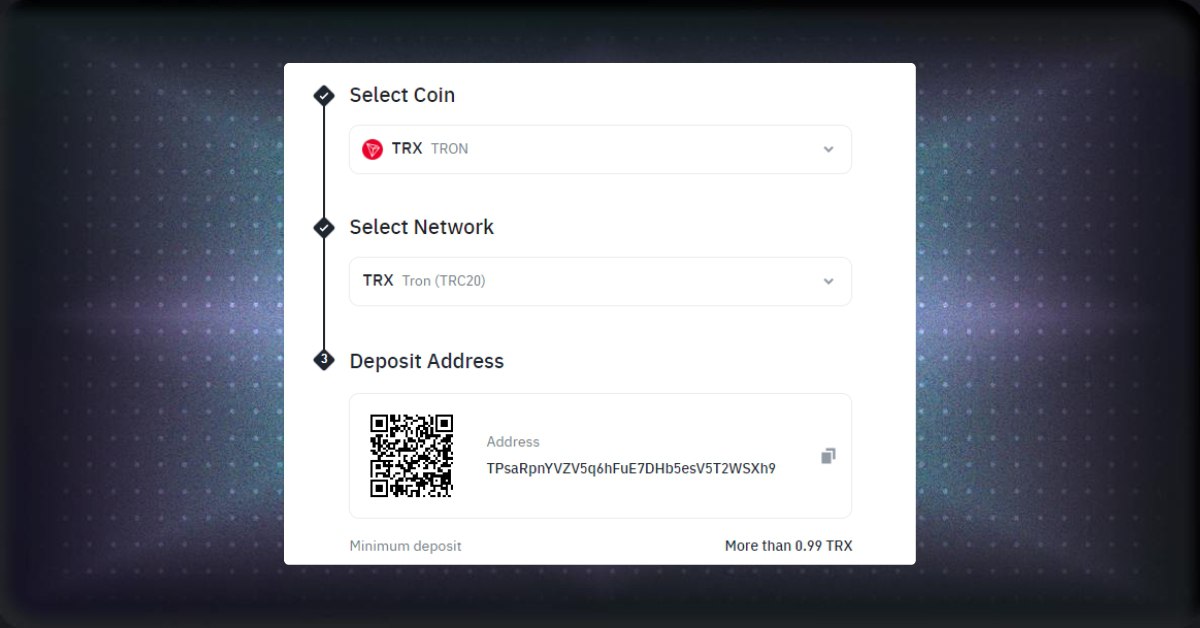
Get the deposit address
Step 2: Open TronLink and Send TRX
- Open your TronLink wallet. You need to send TRX to TronLink first to activate the wallet.
- Click “Send” in your wallet interface.
- Chose TRX.
- Paste the deposit address that you just copied.
- Enter the amount of SOL you want to withdraw.
Important: Always leave some TRX in your wallet to cover the transaction fees in case you don’t have enough energy and bandwidth.
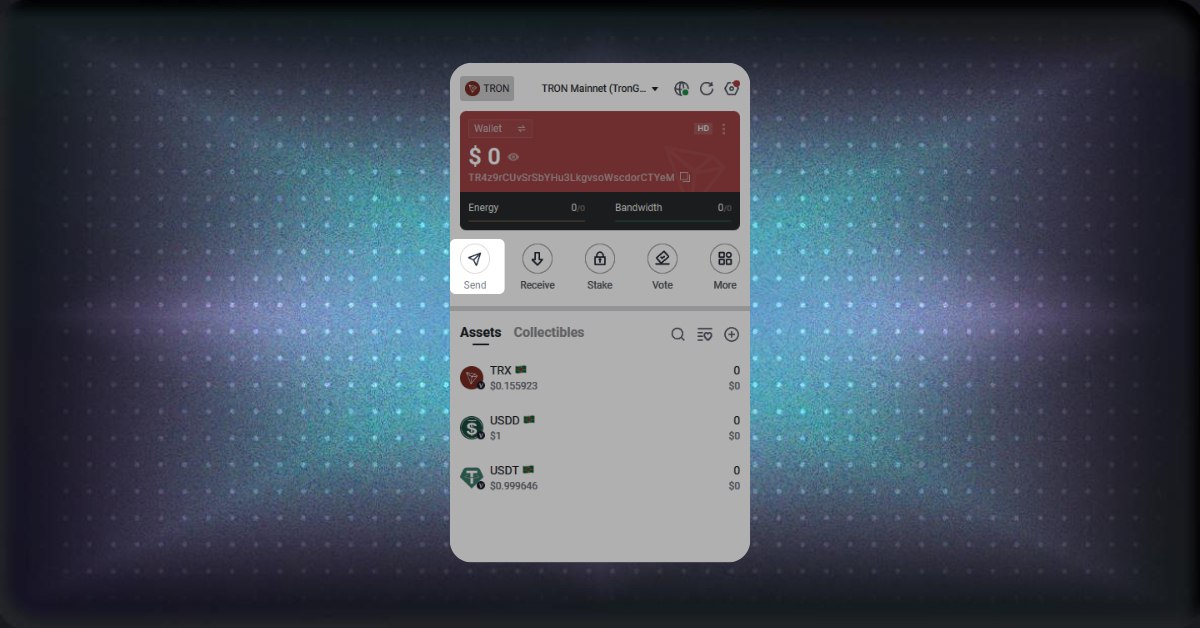
Withdraw TRX with TronLink
Step 3: Confirm and Complete the Transaction
- Double-check the deposit address.
- Click Next and review the details of your transaction.
- Once everything looks correct, confirm the transaction. Your Binance account should receive TRX in a few minutes.
Conclusion
In this article, we have covered the basic concepts users need to understand to transfer TRX. A complete guide on how to send and receive TRX is also provided.
Share on Social Media:
